Azure Builds & Azure Pipelines, part of the Azure DevOps Services suite, provide a Continuous Integration and Continuous Deployment/Delivery framework that you can get started with right away. This article looks at different approaches for handling Continuous Deployment across multiple environments so that you ensure a successful journey towards Continuous Delivery.
Build Per Environment
Traditionally, when building .Net applications, multiple builds are used to distinguish environments. Manual deployments are then triggered once the code has been approved for a specific environment. For those using previous versions of TFS or similar, this may be a familiar release pattern. Parameters are set and used at build time to transform configuration files or code to enable environment specific connectivity.
Pros
- Utilize existing infrastructure or deployment processes without changes to current code.
- Enables migration of source to Azure Repos without affecting deployment process.
Cons
- Risk of code being introduced due to timing of builds for different environments.
- If environment specific branches are used, potential merge conflicts and resolutions could cause environment specific bugs.
- Not utilizing automation for environment deployments and approvals.
- Lack of built-in transparency and reporting on deployments.
One Build, Configuration Transformation
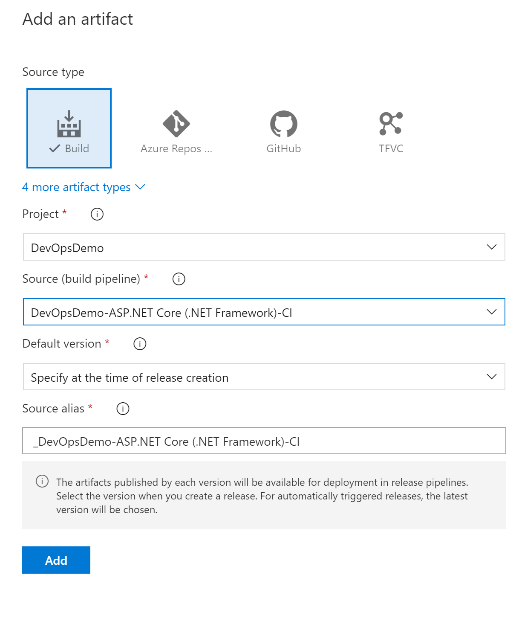
Once you have a build configured to publish an Artifact, you can move to deploying that same Artifact across multiple environments. To achieve this using Azure Pipelines, you need to pass configuration to the environment.
The Azure App Service task, among others in the Azure DevOps Marketplace, provides built-in functionality to perform configuration transformation.
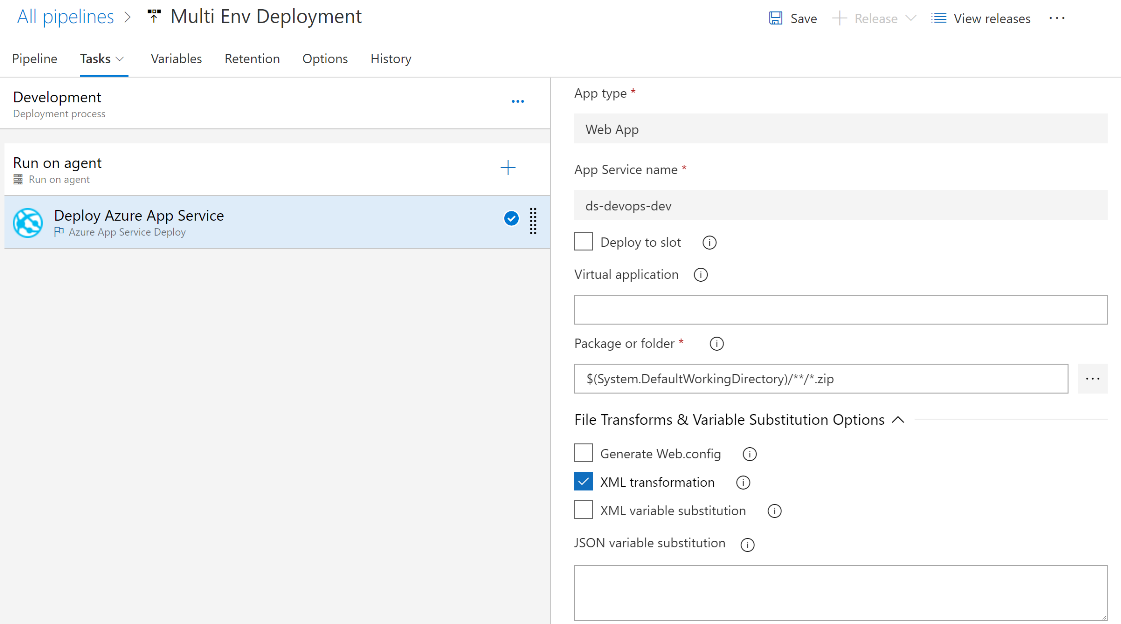
By selecting ‘XML transformation’ option in the task, the task will look for any files ending in the ‘config’ file extension and match them to the name of the environment step. In this example, the environment name is Development, so web.development.config will be used for the transformation!
Pros
- Single build artifact deployed across each environment ensuring same code used.
- Utilize built-in, industry standard methods for setting .net configuration.
Cons
- Configuration transformation must be supported by the task.
- Sensitive, unencrypted information may be stored in transformation files providing unauthorized access.
Another option is to utilize ‘XML variable substitution.’ Sensitive information can be stored and secured within Azure Pipelines vs. in plain text transformation files.

In this example, the web.config file for the Production environment will have a ProdConnectionString variable defined in either the applicationSettings, appSettings, or connectionStrings sections of the web.config. This variable will then be subsituted with the environment specific and secured value from Azure Pipelines.
Continuous Deployment
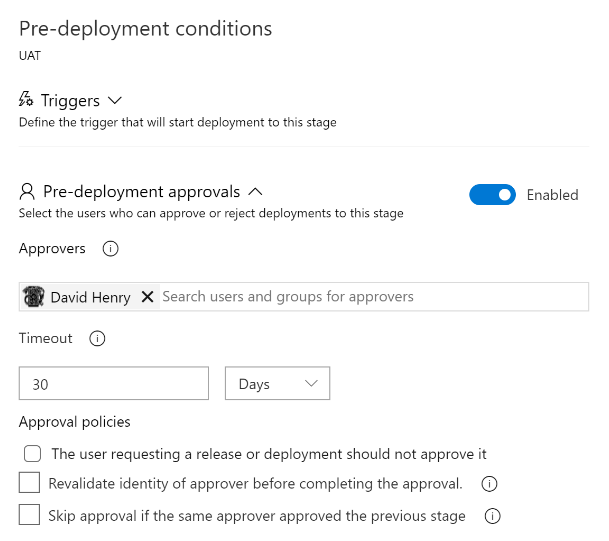
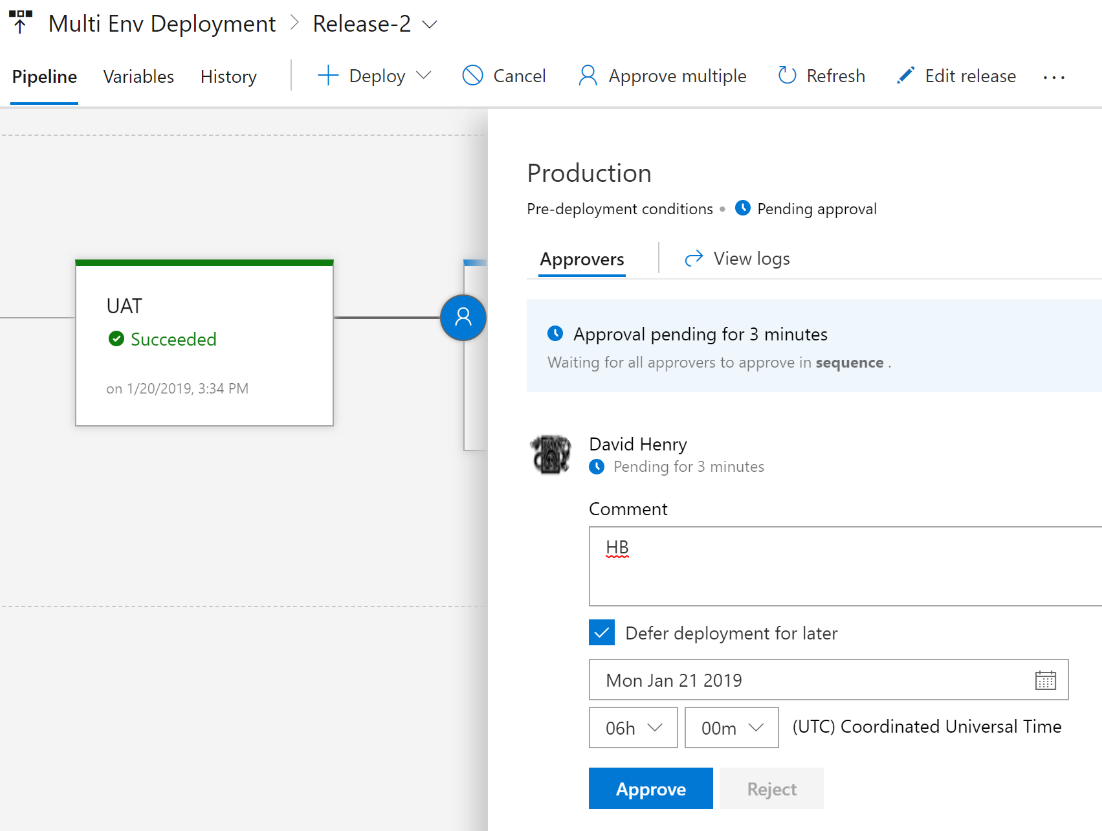
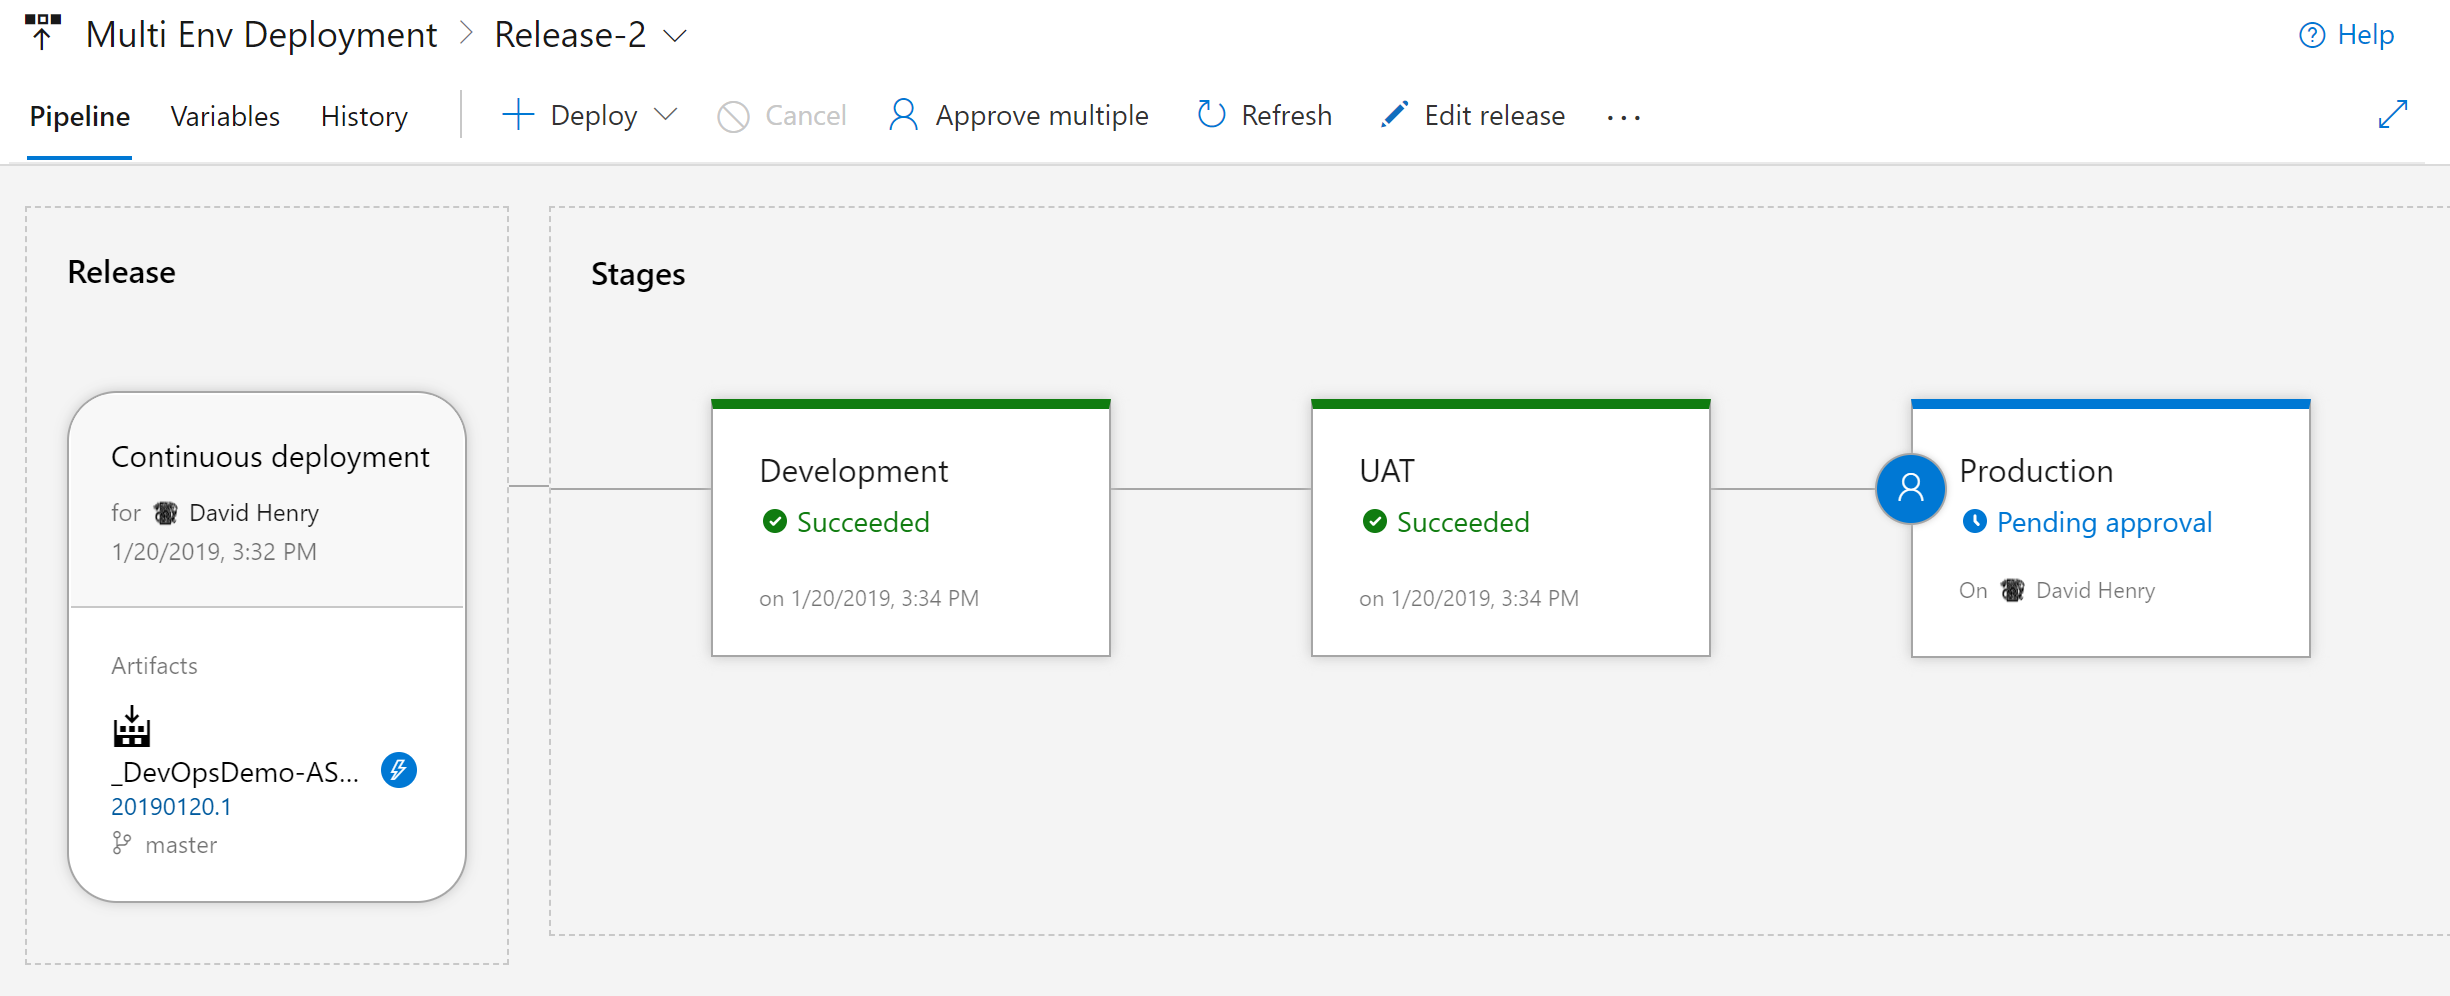
Once each environment is configured by Azure Pipelines, control how the code is promoted through each environment. Continuous Delivery is established by automating quality gates and building confidence in the code, so that it can flow from development to production. The Continuous Deployment starts with manual approvals and identifies how to establish and then automate the quality gates.
For Azure Pipelines, approvals can be set on each environment so the same build artifact can be used, and stakeholders can be provided the transparency they require on current pipelines status.